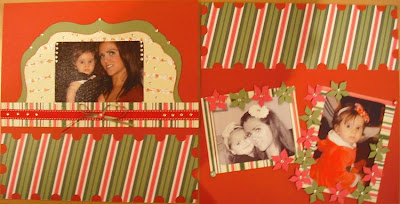
This is the double page I made for the 'T is for Texture' January challenge. I used photos of my family from Christmas 1998. Because the colours were so mixed I changed them all to sepia before printing them out.
This month we are scraplifting a layout by
Stacey Hansen, called Life's a highway, from September 2011
Creating Keepsakes Magazine. We are challenging you to use lots of texture (or lumpy bits), make a double layout and lots of photographs.
Left hand page
Right hand page
I used:
2 sheets Red Bazzill cardstock
1 sheet Leapfrog Bazzill cardstock
1 sheet Salt Dotted Swiss Bazzill Cardstock
QuicKuts dies - Poinsettia, treelights, Lucy Alphabet
Creative Memories Large Circle Template
The patterned papers are American Crafts Christmas Dear Lizzy collection, Twinkling Tree, Gracious Gifts, Garland Greetings and Poinsettia and Pine.
Here is what I did:
Use the two pieces of red cardstock as a base for the double layout.
Cut two pieces of diagonal red white and green stripe, 4" x 12", use TT FUNdamental Postage Stamp template to draw pattern along the top of both pieces, just to mark where to cut, then using a small 5/8" circle punch cut notches in place. Stick these to each piece of red about 2" up from the bottom so the pattern runs right across both pages, leave top unstuck to allow for tucking circle and bracket in place later.
Use a medium sized 'Swanky Frame' TT FUNdamental shape as a template. With Leapfrog cardstock cut half a frame following the outside edge of this shape. Cut a piece from holly paper using the inner frame as a guide. Mount the holly paper on top of the green, and tuck this under the diagonal striped paper on the right side of the layout to the right of this piece, about 3" down from the top. Trim where this overlaps the side of the layout.
Cut about 3/4 of a circle using the outer edge of the CM template and the fine stripe paper. Cut the inner circle from the dotted Swiss cardstock. Mount white over stripe and cut down the centre. Mount half of this shape on each side of the layout so they meet in the middle. See sketch for placement, but this is also about 3" down from the top. This is also tucked under the diagonal striped paper, and all is stuck down. (However I wanted a little spare red cardstock for making flowers, so I gutted some from under where the circle is going to sit before sticking all down for this purpose!).
I ran a wide red grosgrain ribbon with a white stitch effect across the bottom of the diagonal striped paper, then added a 5mm green satin ribbon on top of this, with a green bow to the left side of the left page.
I matted all my photos in white and arranged them across the layout as in the sketch (roughly).
Then I dusted off the QuicKutz, which has been neglected since I acquired my Cricut! I got busy and cut 16 poinsettia petals and 16 leaves, arranging these in pairs to make 8 flowers. I curved the petals with the scissor blade and attached each pair together with a gold brad, these were added to the layout with a 3D foam pad. The leaves were added later, 2 to each flower. Then I cut lots of small tree bulbs and arranged in a garland along the top of the layout, each of these is raised on a tiny piece of 3D foam too.
Next I cut my title using Leapfrog cardstock and the Lucy Alphabet dies. I arranged these letters inside the white circle.
Thanks for looking.
If you want more details of this layout please see my
blog.
For more details of this challenge please go back to the post titled 'T is for Texture' of 01/01/12 on this blog.


