The dress was red and white gingham, the year was 1956.
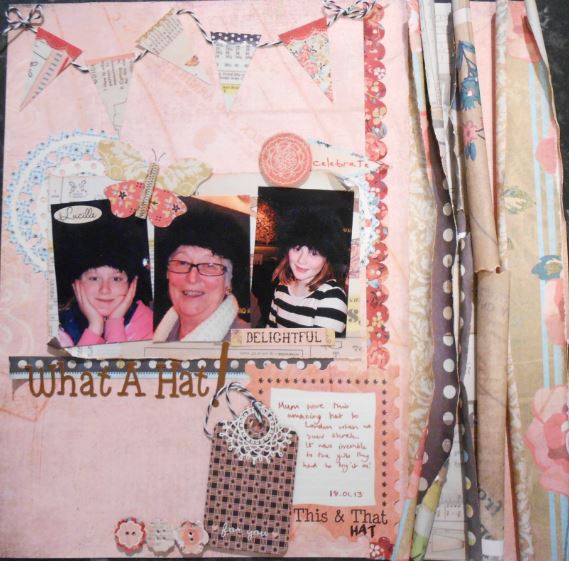
This is my design team layout for the scraplift challenge.
A quick reminder that we are scraplifiting the talented Morag Cutts, and here is her BLOG The technique for this month is to use
Ripped paper!
This is Morag's original layout ...

... and our sketch

I used:
Basic Grey Lucille papers - Pin It, Pleat, Seams & Element Sticker Sheet
 Tear two 2" x
12" pieces of both 'Pleat' and 'Pin It'. The torn edges were further
distressed with chalk inks. Roll back and scrunch the torn edges.
Tear two 2" x
12" pieces of both 'Pleat' and 'Pin It'. The torn edges were further
distressed with chalk inks. Roll back and scrunch the torn edges.
 Use the Creative Memories Circle cutters and cut 1
circle with 'Pin It' and the outer
edge of the medium size ring using
the blue blade.
Use the Creative Memories Circle cutters and cut 1
circle with 'Pin It' and the outer
edge of the medium size ring using
the blue blade.
Gut this circle with the inner edge of the large ring and the red blade. Set smaller circle aside to use later.
Distress the circles and mount the smaller one over the gutted larger circle.
 Cut dressmaker dummy with Sizzix die from 'Pleat'
paper. Attach to bottom right of layout with 3D foam pads, and decorate with
more punched flowers and fronds.
Cut dressmaker dummy with Sizzix die from 'Pleat'
paper. Attach to bottom right of layout with 3D foam pads, and decorate with
more punched flowers and fronds.
 Add 'Delightful' sticker to a scrap of paper and
trim. Stick over 'Life's a Picnic' at top left of page, decorate with more
punched flowers and fronds.
Add 'Delightful' sticker to a scrap of paper and
trim. Stick over 'Life's a Picnic' at top left of page, decorate with more
punched flowers and fronds.

Basic Grey Lucille papers - Pin It, Pleat, Seams & Element Sticker Sheet
black organza ribbon, 1" black lace, black DMC embroidery thread, decorative leaf pins
Stampin' Up stamps and punches
Martha Stewart punches
Sizzix die - dressmaker's dummy, Liquid Pearls
Sizzix die - dressmaker's dummy, Liquid Pearls
Here is what I did:
Use a spare sheet of paper 12" x 12" as base to build your layout on, this will not be seen once layout
complete, so any colour will do.
For the main area use 'Seams' paper - tear this
down the centre so you have two pieces 12" x 5 3/4" vertically.
 Tear two 2" x
12" pieces of both 'Pleat' and 'Pin It'. The torn edges were further
distressed with chalk inks. Roll back and scrunch the torn edges.
Tear two 2" x
12" pieces of both 'Pleat' and 'Pin It'. The torn edges were further
distressed with chalk inks. Roll back and scrunch the torn edges.
Layer the papers so that the larger pieces cover
the main area, and the other two papers show beneath the opening. As the papers
are double-sided you will see all six surfaces of the patterned papers.
Use two pieces of 'Pleat' to fill in the gaps at
the top and bottom of the layout. These need to be about 4" x 2 1/2".
Once you are happy with the placement this can all
be stuck down.
 Use the Creative Memories Circle cutters and cut 1
circle with 'Pin It' and the outer
edge of the medium size ring using
the blue blade.
Use the Creative Memories Circle cutters and cut 1
circle with 'Pin It' and the outer
edge of the medium size ring using
the blue blade. Gut this circle with the inner edge of the large ring and the red blade. Set smaller circle aside to use later.
Cut 1 circle with 'Pleat' using outer edge of middle ring and the red blade.
Distress the circles and mount the smaller one over the gutted larger circle.
Place to left of centre on page.
Cut a photo mat 4 1/2" x 3 1/2" from
black dot side of 'Pleat' paper. Trim photo to 4" x 3". Mount these
over the circle.
Tip: when using element
stickers de-tack them before use.
Use Judi-Kins, gift tag envelope and 'Pin It'
paper to make a small envelope. Place to right of circle. I added two tags from
the element sheet, with some ribbon threaded through the holes in the top.
Decorate the envelope with flowers and fronds punched from 'Pin It' paper,
using Martha Stewart punches. Use 3D foam pads for some of these elements.
 Cut dressmaker dummy with Sizzix die from 'Pleat'
paper. Attach to bottom right of layout with 3D foam pads, and decorate with
more punched flowers and fronds.
Cut dressmaker dummy with Sizzix die from 'Pleat'
paper. Attach to bottom right of layout with 3D foam pads, and decorate with
more punched flowers and fronds.
Use large label from element sheet below envelope,
punch label using Stampin' Up punch add journalling / quote and stick over
larger label.
Take red circle sticker from element sheet and cut
button using Sizzix die. Tie a little embroidery cotton through the holes. Add
to top of label.
Using Stampin' Up sewing stamps, and Cocoa Memento
ink, stamp tape measure and pattern pieces onto scraps of paper.


 Add 'Delightful' sticker to a scrap of paper and
trim. Stick over 'Life's a Picnic' at top left of page, decorate with more
punched flowers and fronds.
Add 'Delightful' sticker to a scrap of paper and
trim. Stick over 'Life's a Picnic' at top left of page, decorate with more
punched flowers and fronds.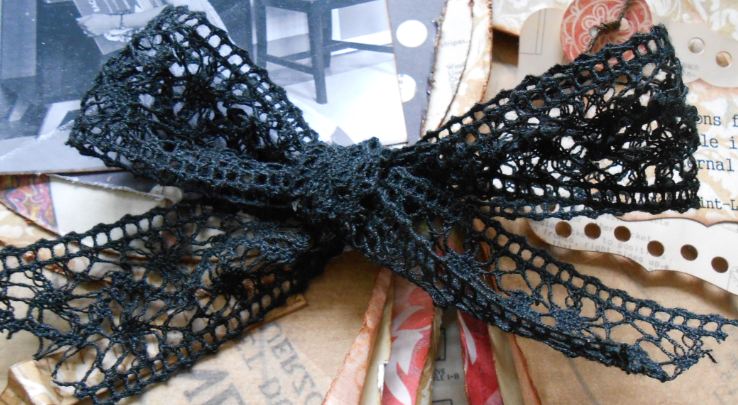
Tie Lace into a large bow and attach with wet glue
to centre of layout. Add leaf pins to envelope, stick ends through the 3D foam
pads used to raise the elements.
Add a tiny dot of lemon Liquid Pearls to centre of
each flower.
More details about the photo and another layout can be found on my blog
A Moment In Time
Thanks for looking, and please see the details of the challenge on the 'R is for Ripped' post.
A Moment In Time
Thanks for looking, and please see the details of the challenge on the 'R is for Ripped' post.