Pages

Wednesday, 25 April 2012

May Sneak Peek

What do you think we have planned for the very merry month of May?


The challenge will be published on 1st May, please call back then for details.

In the meantime there is still time to take part in the April Scraplift challenge until 5th May.
The Card challenge is still running until 15th May.

Sunday, 22 April 2012

How I made my April page III


This is my version of this months challenge.


I used the Apronista as my base page, then added three vertical strips of Home Sweet Home measuring 11x2" with inked edges.
A strip of the stripey side of Blue Plate Special, also 11x2" was added across the bottom with a Martha Stewart punched edge underneath in sugar cookie bazzill.
I then cut a circle which I pucnched using a different Martha Stewart corner punch and placed to the right.
The photo is approximately 6x6" and is placed onto bazzill punched with a Martha Stewart PATP, I gently folded the edges forward for dimension. I added a bird and branch from a Stampin' Up punch mounted on 3d foam, and several branches into the floral area.
A spray of pearls was tucked in along with some 3mm lime velvet ribbon.
I also added some green ribbon from my stash which was cross stitched randomly into place.
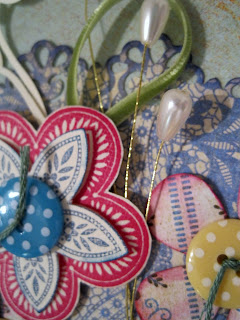
There are a variety of flowers on the page, some cut from the Home Sweet Home paper, torn roses from bazzill. The one above is a Stampin' Up stamp which I did with two colours, then cut and layered. Two sizes of retro daisies were used too. Threaded dotty buttons and Candi centres to finish.

This is the original layout along with our sketch.
 
Still time to enter - You have to be in it to win it! TFL xxx

Thursday, 19 April 2012

Your Cards for April

We have two pretty entries to show off already, thanks for taking part in our April showers card challenge.


CAROL 


SUSIE LITTLE

RITA

HAYLEY
SAM


Looking forward to seeing what you make.

As always pop onto the 15th April Card challenge post for full details of entering this challenge, which runs until 15th May.

Wednesday, 18 April 2012

How I made my April Layout II - Little Miss

Me!


This month we have scraplifted this beautiful layout by BettyLou1 and the theme is to use lace of any kind on your layout.


This was our sketch

For this DT layout Basic Grey 'Hello Luscious' collection

inviting

raspberry syrup

simply grand


Cut the Raspberry Suryp paper until it was about 11"x11", distress and ink the edges and mounting centrally ont the Bazzill.

Cut three strips from Simply Grand paper 1.5"x10", and three strips from the vanilla side of Inviting 1.75"x10.25".  Distress and ink the edges of al six strips, mount the coloured strips centrally onto the vanilla strips. Arrange these strips vertically on the layout about 0.5" apart.

Cut some 6" circular shapes - I used my Cricut and the Striaght from the Nest cartridge and cut the lacy shape from pink Bazzill and the shadow from cream Bazzill. Ink both shapes and layer the pink on the cream and position to the right of the layout as shown.

Make a mount for one corner or the photo from cream Bazzill and trim with Martha Stewart round the page punch in a lacy style. Distress and ink the edges of the photo and stick to mount. Ink edges of mount and stick mounted photo to layout, leavng the very bottom unstuck, for trimming later.

Cut a strip from grid side of Invitng 10.5"x 3. Distress and ink then trim along the bottom long edge with antique style lace. Mount acoss the bottom of the layout about 2" up from the bottom, tucking under the photo. Stick the velvet ric-rac along the length of this strip, over the photo and tuckig the ends under the paper at either end.

Tie a bow with a piece of sheer organza ribbon to the right side of velvet strip.

Decorate the big circles with a selection of flowers from. Add buttons to the centre of these flowers stitching in place with DMC thread, tie in a knot at the front of each button. decorate further with loops of narrow satin ribbon and a wired crystal spray.

Add a small title by printing onto vanilla side of patterned paper and punch with oval SU punch. ink and layer onto another scrap of patterned paper punched using the SU scalloped oval punch, ink and attach with 3D foam pads to top left of photo.


Thanks for looking and reading, hope you will take part in this challenge. Pop back to the April challenge entitled 'L is for Lace' or to my blog for more details.

Sunday, 15 April 2012

April Card Challenge - Drip, drop, drip....

Little April Showers.....

Happy Anniversary to our card challenge - yes, the challenge is 1 year old today!
What better way to celebrate than to have the lovely Elaine from Quixotic Paperie back?
Elaine stocks an amazing range of beautiful rubber stamps including Kraftin' Kimmies, plus papers, dies and all-sorts - take a peek.

She very kindly started us off last year and has returned with a new challenge - April Showers.
This can be interpreted as rain, baby or bridal showers - just let your creativity rule.

Here are the design team's creations based on the April showers theme.
KAREN


SUE


our guest designer for April

Thanks for looking, as always we welcome your comments.
Please have a go at entering the challenge, add a link to your comment or emailing an image.
Good Luck

Our thanks to Elaine for setting the challenge and to Claire for being our guest designer for April.

A super prize offered by Elaine at Quixotic:
A Pack nof Make-it-Colour Card

MakeitColour is a new alcohol marker blending cardstock made in Australia.
Compatible with alcohol based inks: Copic Markers, Prismacolor Markers, Pro Markers, Tria Markers
•A4 (210 x 297mm)
•250gsm
•Ultra Smooth & Silky surface
•Acid free & Archival
•Laser & Inkjet compatible
•Ideal for stamping and card making

Saturday, 7 April 2012

Winner of the March Challenge

Thanks you to all who entered the 'G is for Glitter' challenge. We have a winner, kindly selected by Anita.


....and that winner is Claire better known as SILVER CUSTARD with this very glittery creation.


Well done Claire, please email us and we will get your prize of 10 Stickles out to you. Prize kindly supplied by Jill of Cardinal Colours.

Friday, 6 April 2012

How I made my April Layout I

Here is one of my design team layouts for the April scraplift challenge. The technique is using Lace, and in this case I have made my lacy bits with cardstock, punches and the Cricut.

The photo was taken of my daughter Catherine at five months old, in a lemon babygrow. We had visitors that day and something has really made her chuckle.


Here is a reminder of Betty Lou1's original layout that we chose to scraplift.

This is the sketch drawn from the layout.


I used patterned papers from Basic Grey's Picadilly collection
Apronista

Blue Plate Special

Home Sweet Home
Here is how it was made:

Using Sugar Cookie Bazzill as a base, tear a 11" x 11" square of 'Blue Plate Special' with blue side up. Ink the edges and stick centrally to Bazzill.

Cut 3 strips from 'Home Sweet Home' paper 1.5" x 10" distress and ink the edges and then mount onto strips of Bazzill and distress and ink the edges again. Lay these vertically across the layout about 1" apart, starting about 2.5" in from the left.

Cut some 6" circular shapes - I used my Cricut and the Heritage Cartridge and cut yellow side of 'Home Sweet Home' paper Tree 2 - shift - charm at 6" for the larger circle. The smaller circle was cut from the blue side of 'Apronista' paper Tree 2 - charm at 6". Distress and ink inside and out of the yellow frame circle and mount the frame over the solid blue. Either cut off the tiny circle at the top of the charm or position so that it will be under the photo and stick to right side of the layout.

Make a mount for one corner or the photo from Bazzill and trim with Martha Stewart round the page punch in a lacy style. Distress the edges of the photo and stick to mount. Ink edges of mount and stick mounted photo to layout, leaving the very bottom unstuck.

Cut a strip of stripy side of Blue Plate Special 1.5" x 10" - distress and ink. Mount this to a strip of Bazzill, after trimming one long edge with a border punch to give a lacy edge - distress the straight edges and ink all edges.  Stick the velvet ribbon along the length of this strip, tucking the ends under the paper at either end. Stitch over the ribbon with DMC thread and some large cross stitches. Mount this strip onto the layout, tucking the top edge just under the photo.

Tie a bow with a piece of sheer organza ribbon to the right side of velvet ribbon strip.

Decorate the big circles with flowers cut from scraps of cardstock and patterned papers using the 'Mother's Day Bouquet' cartridge and the Cricut

Add buttons to the centre of these flowers stitching in place with the DMC thread, tie in a knot at the front of each button. decorate further with loops of organza ribbon and a wired pearl spray.

Add a small title by stamping onto a scrap of cardstock, cut out, ink and attach with 3D foam pads.

Thanks for looking and reading, hope you will take part in this challenge. Pop back to the 'L is for Lace' post on this blog to see full details of the April challenge, or check out my blog - A Moment in Time.

Wednesday, 4 April 2012

Your Scraplifts for April

First up for April is this Paris themed layout is:
DEBBIE

WENDY P

SCRAPDOLLY

SCRAPPY SARAH

SHARON

MINI 

DEBBY

GLYNIS

JACKIE

KRAFTY KAREN

JULIE

DAWN RUTH

SHARON II

JULIE II

Who will be next?


Please see post titled 'L is for Lace' for details of this challenge.